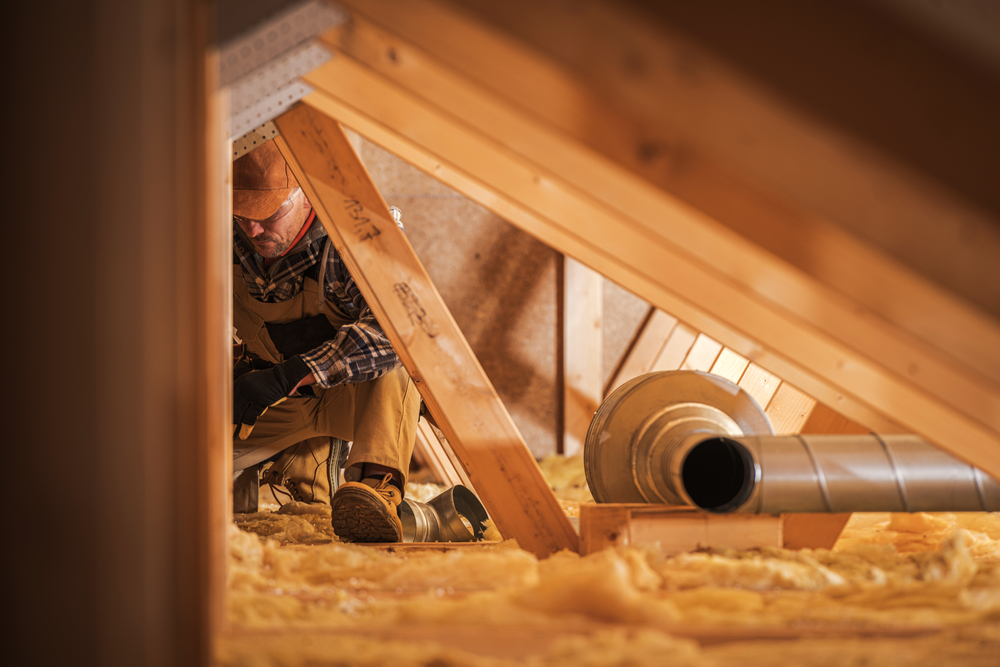
For homeowners in Northern California and Nevada, energy bills can feel like a runaway train. Summers in Sacramento, CA bring triple-digit heat, while winters in Sparks, NV deliver biting cold that seeps through every gap in your home’s envelope. If your utility costs keep climbing despite efforts to manage them, the culprit may be sitting right above your head. Attic insulation is one of the most cost-effective upgrades a homeowner can make, and understanding the ROI behind this investment can help you make a smarter, faster decision about protecting your home and your wallet.
Why Attic Insulation Is the Starting Point for Energy Savings
Most homeowners think about energy efficiency in terms of windows, doors, or HVAC systems, but the attic is actually where a significant portion of conditioned air escapes. Heat rises, and without adequate attic insulation, that warm or cool air you pay to generate simply bleeds out through the ceiling and roof assembly. According to the U.S. Department of Energy, heating and cooling account for roughly 50 to 70 percent of the energy used in a typical American home. Addressing the attic first creates a foundation for all other energy savings insulation efforts to work more effectively.
In Sacramento, CA, where summers regularly exceed 100 degrees Fahrenheit, an under-insulated attic can force your air conditioning system to work overtime for months at a stretch. In Sparks, NV, where the high desert climate brings freezing winters and scorching summers, the demand on your HVAC system is just as intense but comes from two directions. Upgrading your attic insulation is not just a comfort improvement; it is a financial strategy with measurable returns.
Understanding Insulation Cost Savings in Real Numbers
The ROI of attic insulation becomes concrete when you look at actual numbers. The average homeowner in the United States spends between $1,500 and $3,000 per year on energy costs, with a large share attributed to heating and cooling. Homes with inadequate attic insulation can see energy savings insulation upgrades of 10 to 50 percent depending on their starting point and the quality of the new installation.
For a homeowner in Sacramento, CA paying $2,400 annually in energy bills, a 20 percent reduction equals $480 saved per year. A professional attic insulation installation in that region typically costs between $1,500 and $3,500 depending on the square footage, existing insulation condition, and the type of material used. That means the payback period on the investment can be as short as three to seven years. After that window, every year represents pure savings with no additional cost.
In Sparks, NV, where both heating and cooling seasons are long and demanding, homeowners may see even higher savings percentages. A home that was previously insulated to R-19 and upgraded to R-38 or R-49 can experience dramatic reductions in monthly utility costs almost immediately after installation. When you calculate those savings over a 10 to 15 year window, the total return on investment frequently exceeds three to five times the original insulation cost.
How Attic Insulation Affects Home Value in Northern California and Nevada
Beyond the monthly utility reduction, attic insulation improvements directly affect the resale value of your home. Real estate markets in Northern California and Nevada are competitive, and buyers are increasingly savvy about energy costs. A home that demonstrates lower average utility bills and boasts a high R-value attic insulation system commands attention in the listing and during negotiations.
In Sacramento, CA, the California Energy Commission maintains strict building codes, and homes that meet or exceed current insulation standards are seen as more desirable and compliant. When you upgrade your attic insulation, you are not just saving money today; you are improving the marketability of your property tomorrow. Real estate appraisers increasingly account for energy efficiency upgrades, and a documented attic insulation upgrade can add to your home’s assessed value.
In Sparks, NV, the same logic applies. Nevada’s residential building codes have evolved to reflect the climate demands of the region, and a home with modern attic insulation stands out favorably during a pre-listing inspection. Buyers who understand the long-term insulation cost savings will often pay a premium for a home that already has the work done, reducing their out-of-pocket expenses after purchase.
Choosing the Right Insulation Type for Your Climate Zone
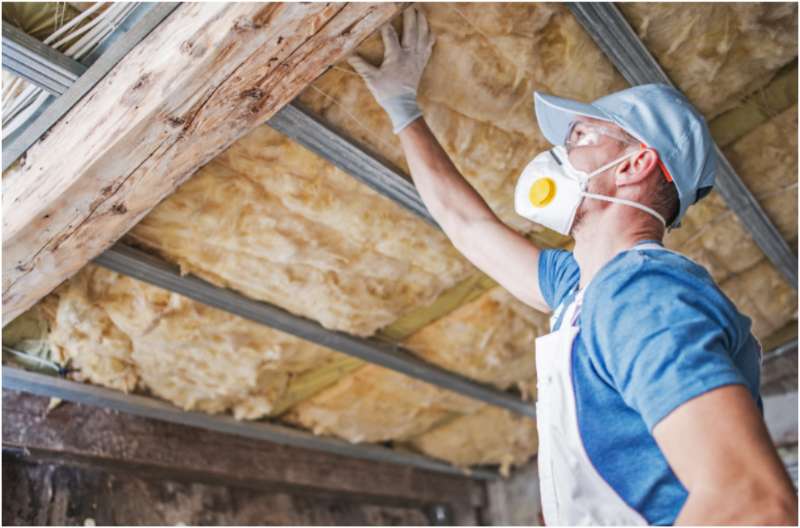
Not all attic insulation is created equal, and the best choice depends on your specific climate, existing structure, and performance goals. In Sacramento, CA and Sparks, NV, the most commonly installed types include blown-in fiberglass, blown-in cellulose, and spray foam. Each has a distinct profile of cost, R-value per inch, air sealing capability, and installation complexity.
Blown-in fiberglass is a popular choice for its cost-effectiveness and ease of installation over existing insulation. It adds R-value quickly without requiring removal of the old material in most cases. Cellulose, made from recycled paper treated for fire resistance, offers slightly better air sealing properties and is an environmentally conscious option. Spray foam, while the most expensive upfront, delivers superior air sealing and the highest R-value per inch, making it a strong long-term ROI choice for homeowners who plan to stay in their homes for a decade or more.
For Sacramento, CA homeowners, climate zone considerations from California’s Title 24 energy code recommend attic insulation levels of R-38 to R-49 depending on the specific zone. For Sparks, NV homeowners, energy codes based on the International Energy Conservation Code suggest similar targets, with R-49 being the recommended ceiling in colder mountain-adjacent zones. Hitting these targets or exceeding them ensures that your energy savings insulation goals are fully met and that you qualify for any applicable rebates or incentive programs.
Rebates, Incentives, and Financing That Improve Your ROI
One of the most overlooked factors in calculating attic insulation ROI is the availability of rebates and incentive programs that reduce the upfront cost significantly. In Sacramento, CA, Pacific Gas and Electric (PG&E) and Sacramento Municipal Utility District (SMUD) both offer rebate programs for qualifying home insulation upgrades. These rebates can range from a few hundred dollars to over a thousand dollars depending on the scope of the project and the improvement in energy performance achieved.
In Sparks, NV, NV Energy provides rebate programs for residential customers who upgrade their home insulation to meet or exceed recommended efficiency thresholds. These programs are periodically updated, so working with a qualified insulation contractor who is familiar with current utility incentives is important for maximizing your total savings.
At the federal level, the Inflation Reduction Act extended and expanded tax credits for energy efficiency improvements, including insulation. Homeowners can claim up to 30 percent of the cost of qualifying insulation materials as a federal tax credit, with an annual cap that varies by improvement type. When stacked with state and utility rebates, these incentives can reduce your net out-of-pocket cost by 30 to 50 percent, dramatically compressing your payback period and improving your overall ROI.
Conclusion
Upgrading your attic insulation in Sacramento, CA or Sparks, NV is one of the smartest financial decisions a homeowner in Northern California and Nevada can make. The combination of immediate utility reduction, long-term insulation cost savings, increased home value, and available rebate programs creates a compelling case for action. Whether your goal is to lower your monthly energy bills, prepare your home for sale, or simply live more comfortably through the region’s extreme seasonal swings, the numbers consistently support attic insulation as a high-return investment. Getting a professional energy audit and insulation assessment is the first step toward understanding exactly how much you stand to gain.
Need Insulation Near You?
Since 2001, Ace Insulation Inc. has been your premier insulation experts. We take pride in being locally owned and operated as well as offering high-quality service. We specialize in the installation of insulation. Whether you are building a new home or renovating your existing space, we are the place to call. We have many materials to choose from, including fiberglass and spray foam. If you are looking for high-quality work, call us today to schedule your next consultation!
Owning a home in Northern California and Northern Nevada means dealing with a wide range of weather conditions throughout the year. Whether you live in the coastal cool of Petaluma, the sweltering summers of Sacramento, or the high-desert swings of Sparks, your insulation is working hard in every season. Yet most homeowners only think about insulation when something goes wrong, like a sky-high energy bill or a room that never seems to reach a comfortable temperature. A proactive home insulation maintenance checklist keeps small problems from turning into expensive repairs, and it helps your home stay efficient all year long.
The good news is that staying on top of your insulation does not require professional expertise for every step. With a little knowledge and a consistent seasonal routine, homeowners in all three regions can catch issues early, improve comfort, and reduce energy costs significantly.
Why Regional Climate Makes Seasonal Insulation Tips Essential
The climates of Petaluma, Sacramento, and Sparks are distinct enough that a one-size-fits-all approach to insulation simply does not work. Petaluma sits in a valley corridor with cool, foggy winters and moderate summers, which means moisture intrusion and condensation are frequent threats to insulation materials. Sacramento experiences triple-digit summer heat that pushes attic temperatures to extreme levels, making radiant barriers and proper attic ventilation critical components of insulation performance for homeowners. Sparks, located just east of Reno in the high desert, faces dramatic temperature swings, with freezing winters and hot summers that stress insulation at both ends of the thermometer.
Understanding your local climate is the first step toward building an effective home insulation maintenance checklist. Each season brings a different set of challenges, and your inspection routine should reflect the specific demands of where you live.
Spring: Prepare for Heat and Check for Winter Damage
Spring is the ideal time to assess any damage that winter weather may have caused. In Sparks, heavy snowfall and freeze-thaw cycles can compress or shift insulation in attics and crawl spaces. In Petaluma and Sacramento, winter rains can lead to moisture infiltration that degrades insulation over time.
Start your spring checklist by walking through your attic during daylight hours. Look for daylight coming through the roof boards, which signals gaps where heat and conditioned air can escape. Check for signs of moisture, including water stains, rust on metal fasteners, or a musty odor. Wet insulation loses its ability to resist heat transfer and must be replaced promptly.
Next, inspect your crawl space if your home has one. Ground moisture in Northern California is especially problematic in late winter and early spring. A vapor barrier in good condition is essential for protecting the insulation above it. Check for torn or missing sections and ensure the barrier laps up the foundation walls at least six inches.
Spring is also the right time to air-seal any gaps you discover. Use spray foam or caulk to seal around pipes, wires, and ducts that penetrate insulated surfaces. Every gap you close reduces the burden on your HVAC system before the hot months arrive.
Summer: Focus on the Sparks Attic Inspection Guide and Attic Performance
Summer is when insulation performance homeowners care most about becomes obvious. A poorly insulated attic can become a furnace that radiates heat downward into your living space, forcing your air conditioner to run constantly. This is especially true in Sacramento, where summer temperatures regularly exceed 100 degrees Fahrenheit, and in Sparks, where afternoon heat can be intense and dry.
Your summer checklist should center on the attic. Begin with a thorough Sparks attic inspection guide approach, which applies equally well to Sacramento and Petaluma: check your attic insulation depth and compare it to the recommended R-value for your climate zone. Homes in Sacramento and Sparks generally benefit from R-38 to R-60 in the attic, depending on the construction era and existing insulation type.
While in the attic, verify that soffit and ridge vents are unobstructed. Proper airflow through the attic reduces heat buildup and protects your roof from moisture damage in cooler months. If insulation has been blown or placed too close to the eave vents, install baffles to maintain airflow.
Check your ductwork as well. Ducts running through unconditioned attic space are a major source of energy loss. Look for gaps at connections and consider adding duct insulation wrap where sections are exposed. This single step can noticeably improve cooling efficiency and is one of the most impactful seasonal insulation tips for Sacramento homeowners.
Fall: Seal and Fortify Before Cold Weather Arrives
Fall is preparation season. Temperatures drop quickly in Sparks and, to a lesser degree, in Sacramento and Petaluma, and any gaps in your building envelope will become painfully apparent once heating season begins. A thorough fall inspection is your best defense against high winter energy bills.
Walk the perimeter of your home and look for gaps around windows and doors. Check weatherstripping and replace any sections that are compressed, torn, or missing. Pay special attention to door bottoms and sliding glass doors, which are common sources of drafts.
Inside the home, check outlet covers and switch plates on exterior walls. These small openings are often overlooked but can allow significant amounts of cold air to enter. Foam gaskets installed behind outlet covers are inexpensive and easy to install.
In the attic, make sure your insulation is evenly distributed and has not shifted since your spring inspection. Petaluma homeowners should pay particular attention to any areas near roof penetrations or valleys where moisture may have infiltrated during the rainy season. Adding blown-in insulation to thin or uneven areas is a worthwhile fall investment before heating costs climb.
Winter: Monitor Performance and Address Problem Spots
Winter is the season for monitoring rather than major projects, but it is still an important part of your year-round home insulation maintenance checklist. Cold weather reveals weaknesses that warmer months can hide, and catching a problem in January is far better than discovering structural damage in the spring.
Pay attention to ice dams if your Sparks home has a pitched roof. Ice dams form when heat escaping through the roof melts snow, which then refreezes at the eaves. This is a sign that your attic insulation and ventilation need improvement. While ice dams are rare in Petaluma and Sacramento, homeowners there should watch for condensation on windows and walls, which can indicate that warm interior air is hitting cold surfaces due to insufficient insulation.
During winter, check your heating bills against the same period in prior years. A significant increase in costs without a corresponding change in usage habits often points to insulation degradation. If rooms feel cold near exterior walls or floors, that is another indicator worth investigating.
Keep an eye on crawl space venting as well. Some homeowners close crawl space vents in winter to retain heat, but this can trap moisture. Consult with a local insulation professional about the best approach for your specific home type and foundation design.
Conclusion
A consistent seasonal routine is the foundation of strong insulation performance homeowners across Petaluma, Sacramento, and Sparks rely on to stay comfortable and efficient. By following this home insulation maintenance checklist through every season, you protect your investment, reduce your energy costs, and ensure your home handles whatever the Northern California and Northern Nevada climate throws at it. Seasonal insulation tips are not just about comfort; they are about maintaining the long-term health and value of your home. Start with one season at a time, work through each inspection systematically, and do not hesitate to bring in a qualified insulation contractor when a problem is beyond a simple DIY fix. The effort you invest in your insulation today pays dividends in comfort and savings for years to come.
Need Insulation Near You?
Since 2001, Ace Insulation Inc. has been your premier insulation experts. We take pride in being locally owned and operated as well as offering high-quality service. We specialize in the installation of insulation. Whether you are building a new home or renovating your existing space, we are the place to call. We have many materials to choose from, including fiberglass and spray foam. If you are looking for high-quality work, call us today to schedule your next consultation!
Northern California’s landscape is diverse, not just in its geography, but also in its climate. From the cool coastal breezes of Petaluma to the hot, dry summers in Sacramento, the weather patterns across the region vary significantly. These climatic distinctions directly influence how homeowners should approach insulation. A one-size-fits-all model simply does not work when addressing the wide spectrum of insulation needs in the region. To ensure optimal comfort, lower utility costs, and long-term durability of structures, insulation contractors must tailor home insulation solutions with a climate-adapted insulation strategy specific to each area.
The Climate Contrast: Petaluma vs. Sacramento
Understanding the weather differences between Petaluma and Sacramento is key to recognizing why insulation strategies should differ. Petaluma, located in Sonoma County, sits near the coast and experiences a temperate maritime climate. The region is known for its foggy mornings, cool breezes, and moderate seasonal temperatures. Summers are warm but rarely hot, and winters are mild and moist. In contrast, Sacramento lies in the Central Valley and is characterized by a Mediterranean climate. Summers are intensely hot and dry, while winters can be cold and damp with periodic heavy rainfall.
These temperature and moisture variations dramatically affect a home’s energy retention and air quality. In Petaluma, insulation must help control indoor humidity and maintain stable temperatures year-round. Sacramento homes, on the other hand, require insulation that can withstand extreme heat in summer while also providing warmth during colder winter months. Effective insulation contractors take these regional nuances into account when recommending the most effective home insulation solutions.
Tailoring Insulation Materials to Local Conditions
Selecting the right insulation material is critical to maximizing performance and energy efficiency. In Petaluma, moisture resistance is a priority due to the coastal air and seasonal rains. Materials such as closed-cell spray foam or rigid foam boards can provide strong thermal resistance while also protecting against moisture intrusion. Additionally, ensuring proper ventilation in attics and crawl spaces is vital to prevent mold buildup and maintain indoor air quality.
In Sacramento, high temperatures and long stretches of dry weather create a need for insulation that resists heat transfer effectively. Blown-in cellulose and fiberglass batt insulation are common choices because they offer high thermal resistance and are cost-effective for large attic spaces. However, insulation contractors often recommend radiant barriers in attics as well. These reflective materials are particularly effective in Sacramento’s climate, where they help deflect the sun’s heat and keep indoor temperatures cooler without over-relying on air conditioning.
Each region’s insulation strategy must also account for the building’s design, sun exposure, and prevailing winds. A house in Petaluma might benefit from sealing drafts around windows and doors to block ocean air, while a Sacramento home may need attic insulation with a higher R-value to withstand summer heat waves.
Importance of Attic Insulation R-Value in Northern California
One of the most significant factors in choosing the right insulation is the R-value, a measure of thermal resistance. The higher the R-value, the greater the material’s insulating power. In Northern California, attic insulation R-value plays a major role in both comfort and energy conservation.
For homes in Petaluma, an R-value of R-38 to R-49 is generally suitable, especially for attic spaces that deal with mild temperature fluctuations. Because the weather remains relatively stable, over-insulating can actually trap moisture inside and create issues with mold. Proper balance between insulation and ventilation is key to maintaining structural integrity and indoor air quality.
In Sacramento, where attic temperatures can soar above 130 degrees Fahrenheit during peak summer months, an R-value of R-49 or higher is often recommended. The goal is to keep hot air out during the summer and retain warmth during winter. Without sufficient attic insulation, Sacramento homeowners risk high energy bills and inconsistent indoor comfort.
Energy efficiency insulation is not only about the thickness of the material but also about its strategic application. Professional insulation contractors assess the entire thermal envelope of the home, identifying weak spots in the attic, walls, and crawl spaces. This comprehensive approach ensures that insulation works effectively year-round and supports energy savings.
Benefits of Climate-Adapted Insulation Strategies
Adopting a climate-adapted insulation strategy for Northern California homes brings multiple long-term benefits. The most obvious advantage is improved energy efficiency. When homes are properly insulated based on their specific environmental conditions, HVAC systems operate more efficiently, reducing energy consumption and lowering utility bills.
Homeowners also experience enhanced indoor comfort. Proper insulation eliminates cold drafts in winter and helps maintain a consistent indoor temperature during scorching summer months. This not only supports physical comfort but also protects the home’s structural elements, including roofing, framing, and siding, from extreme temperature fluctuations.
For residents in Petaluma and Sacramento, the right insulation can also mitigate environmental allergies and moisture-related issues. Coastal areas like Petaluma benefit from vapor-resistant insulation that keeps damp air at bay, while Sacramento homes avoid excessive heat infiltration that can deteriorate insulation over time.
Insulation upgrades also boost property value. Energy-conscious buyers are more likely to invest in homes with proven energy efficiency systems. Updated insulation shows that a home has been well-maintained and thoughtfully adapted to its environment.
Working with Local Experts in Insulation
Choosing experienced insulation contractors familiar with the distinct demands of Northern California is crucial. Professionals based in or around Petaluma, CA, understand the specific seasonal cycles and moisture challenges facing coastal homeowners. Likewise, contractors who frequently serve Sacramento are well-versed in addressing high-heat scenarios and implementing radiant barrier systems or multi-layered insulation solutions.
Local expertise means more than just product knowledge. It includes familiarity with building codes, rebate programs, and weatherization incentives available through California energy efficiency initiatives. These programs often provide financial assistance or tax incentives for homeowners who invest in high-performance insulation upgrades.
A local contractor can also evaluate existing insulation and recommend cost-effective improvements without unnecessary replacements. For older homes, especially those built before current energy codes were enacted, a professional assessment may reveal simple fixes like sealing air leaks or adding attic insulation to meet current R-value standards.
Establishing a relationship with a local insulation expert also makes it easier to maintain, inspect, and upgrade insulation as the home ages. Seasonal checkups, especially before winter or summer extremes, ensure that insulation remains in optimal condition and that your climate-adapted strategy continues to perform effectively.
Conclusion
Northern California’s varying climate zones make it essential for homeowners to adopt customized insulation approaches. From the coastal cool of Petaluma to the heat-drenched valleys of Sacramento, local conditions shape how insulation should be installed, maintained, and upgraded. Understanding the role of attic insulation R-value, selecting materials suited for moisture or heat, and working with regional experts are all steps toward long-term energy savings and indoor comfort.
By investing in targeted home insulation solutions, homeowners can optimize comfort, reduce energy usage, and extend the life of their homes. Choosing insulation contractors who understand the environmental nuances of Northern California ensures that your home is protected against both the fog of the coast and the dry heat of the valley. A well-insulated home is not only a more comfortable place to live, but also a smarter financial investment in an ever-changing climate.
Need Insulation Near You?
Since 2001, Ace Insulation Inc. has been your premier insulation experts. We take pride in being locally owned and operated as well as offering high-quality service. We specialize in the installation of insulation. Whether you are building a new home or renovating your existing space, we are the place to call. We have many materials to choose from, including fiberglass and spray foam. If you are looking for high-quality work, call us today to schedule your next consultation!
Insulating a commercial building is a significant investment that directly impacts energy efficiency, indoor air quality, and long-term maintenance costs. For contractors and developers working in regions like Northern California, especially cities such as Petaluma and Sacramento, the climate and building codes influence the insulation choice more than in many other areas. Among the most common materials used in commercial insulation are spray foam, fiberglass, and blown-in insulation. Each comes with its own set of advantages and drawbacks, and understanding these differences is critical for making informed decisions.
Understanding the Climate Demands of Northern California
Northern California experiences a unique blend of climate conditions that vary across its geography. Coastal areas like Petaluma are subject to more moderate temperatures with relatively high humidity levels. On the other hand, Sacramento, located inland, encounters hotter summers and cooler winters. These contrasting climate zones require tailored insulation solutions that perform well under thermal stress, minimize moisture intrusion, and support long-term energy efficiency.
Commercial properties in this region must also meet California’s stringent Title 24 energy efficiency standards, making insulation performance even more critical. The right insulation not only contributes to regulatory compliance but also helps businesses reduce operational costs in the long run. Before choosing between spray foam, fiberglass, or blown-in insulation, it is essential to factor in how these materials behave under regional conditions.
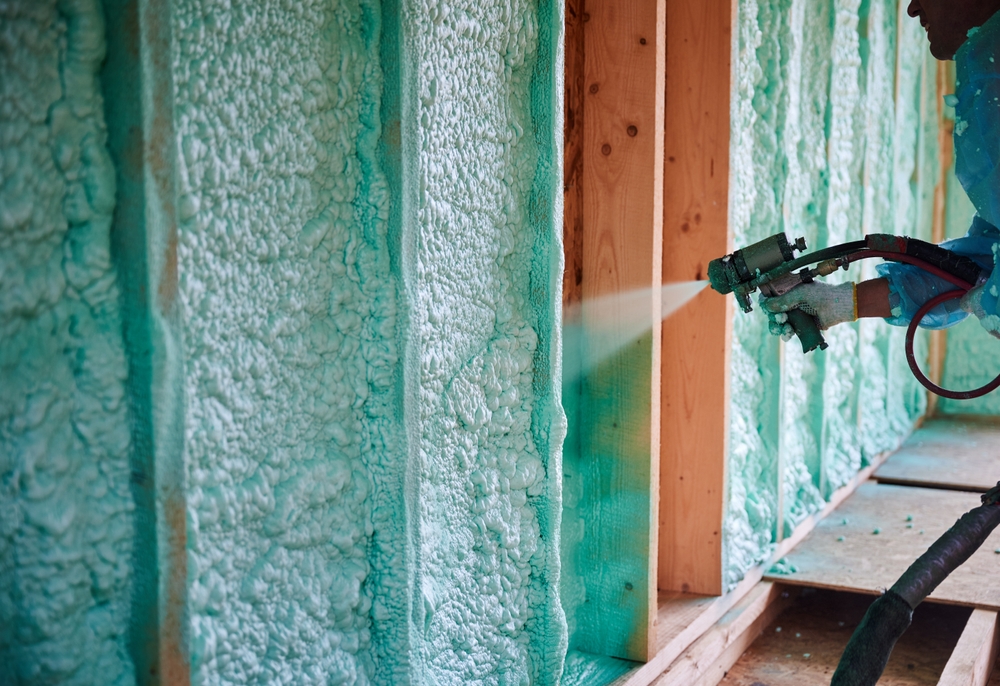
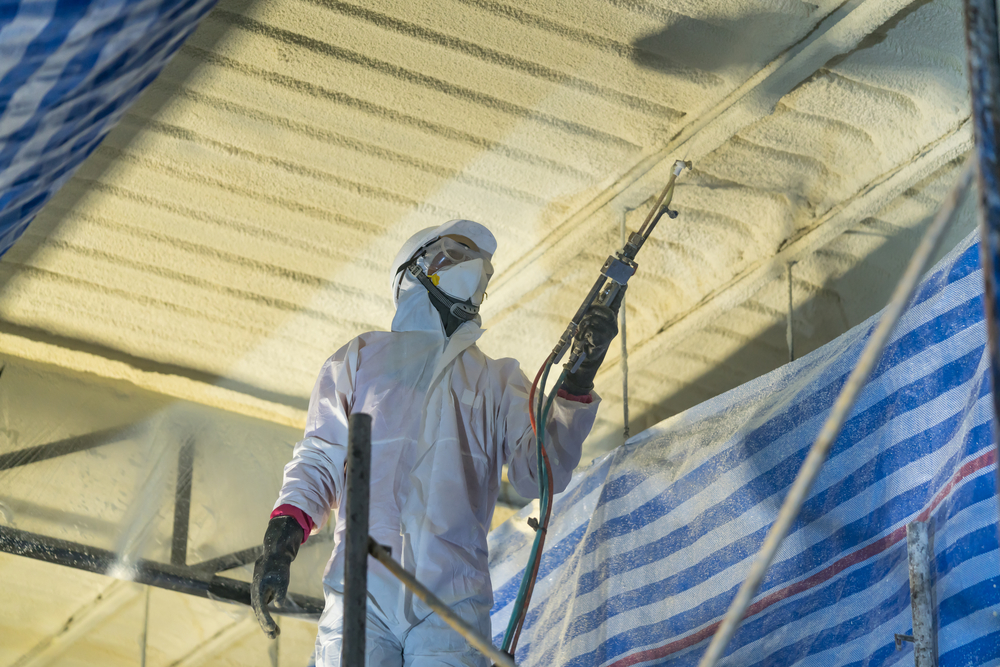
Spray Foam: High Performance with High Investment
Spray foam insulation is often considered the premium choice due to its exceptional insulating properties and ability to seal gaps and cracks. It comes in two primary forms: open-cell and closed-cell. For commercial applications, closed-cell spray foam is typically favored because of its higher R-value per inch and moisture resistance.
In the Petaluma and Sacramento areas, where varying humidity and temperature shifts occur throughout the year, spray foam provides excellent thermal performance and air sealing. It prevents conditioned air from escaping and blocks outside air from infiltrating the building envelope. This air barrier quality is especially important for commercial facilities that prioritize indoor climate control, such as medical buildings, retail centers, and food storage units.
However, this level of performance comes at a cost. Spray foam is significantly more expensive upfront compared to fiberglass or blown-in insulation. Installation requires trained professionals and specialized equipment, which further adds to the expense. Despite this, the long-term energy savings and reduced maintenance can offset the initial investment, making spray foam an appealing choice for developers focused on sustainability and energy efficiency.
Fiberglass Insulation: Traditional, Cost-Effective, and Readily Available
Fiberglass insulation remains one of the most widely used insulation types in commercial construction. Its affordability and ease of installation make it attractive for projects with tight budgets or fast timelines. This material is typically installed in batts or rolls and is known for its resistance to fire and sound transmission.
For commercial buildings in Northern California, fiberglass is most effective in structures where walls and ceilings are designed to accommodate batt insulation during the initial build. In Sacramento, where summer heat can be intense, fiberglass helps delay heat transfer but lacks the sealing capability that spray foam offers. It is less effective at reducing air infiltration, which can lead to higher energy usage during peak seasons.
Petaluma’s slightly milder weather may make fiberglass a more acceptable option, especially in commercial applications where budget takes precedence over top-tier performance. However, it is essential to consider the risk of moisture accumulation. Fiberglass can trap moisture if not properly protected, leading to mold and deterioration. Using vapor barriers and ensuring proper ventilation can help mitigate these risks.
Blown-In Insulation: Flexible and Efficient for Retrofits
Blown-in insulation, made from cellulose or loose fiberglass, is another viable option for commercial applications, especially in retrofit projects. It is installed using pneumatic equipment that blows the insulation into cavities, attics, or hard-to-reach spaces, providing excellent coverage and a relatively tight thermal envelope.
This type of insulation works well in older commercial buildings in cities like Petaluma, where upgrading to modern insulation standards is often necessary. Blown-in insulation adapts to irregular spaces and can be added on top of existing materials, making it less invasive and more cost-effective for renovations. In areas like Sacramento, where cooling demands are high in the summer, blown-in insulation performs admirably in reducing energy loss through the roof and attic spaces.
Cellulose blown-in insulation is also environmentally friendly, as it is typically made from recycled paper products. However, it requires careful moisture management to prevent settling and mold. Loose fiberglass, while more moisture resistant, still has limitations in sealing air leaks compared to spray foam.
When considering blown-in vs fiberglass, the decision often comes down to the structure type and whether the building is new or being renovated. Blown-in insulation generally provides better coverage and thermal performance in older or oddly shaped commercial spaces. Fiberglass, on the other hand, is better suited for new construction with open cavities and standard framing.
Evaluating Your Commercial Insulation Needs
Choosing the right insulation material involves more than comparing R-values and prices. It requires a comprehensive evaluation of the building’s intended use, size, age, and location. In Petaluma and Sacramento, the differences in weather patterns and construction styles demand tailored solutions.
If the project involves a high-end commercial build with strict energy performance goals or involves sensitive equipment or inventory, spray foam offers unmatched insulation quality and air sealing. It is especially beneficial for facilities like tech hubs, data centers, or high-traffic office buildings that must maintain consistent temperatures year-round.
For developers focused on cost control or building out large-scale projects quickly, fiberglass remains a reliable option. It offers basic thermal protection and fire resistance at a lower cost, making it suitable for warehouses, general retail spaces, or light industrial facilities where climate control is less critical.
Blown-in insulation shines in retrofit scenarios and for improving thermal performance in existing buildings. It is also a suitable middle ground for budget-conscious developers who want better performance than fiberglass but cannot commit to the cost of spray foam.
The choice of insulation should also account for building codes, rebate programs, and environmental goals. Working with an experienced insulation contractor for builders ensures proper installation, code compliance, and long-term efficiency. Contractors in Northern California are well-versed in the local climate challenges and can recommend solutions that align with both budget and performance expectations.
Conclusion
Deciding between spray foam, fiberglass, and blown-in insulation for commercial projects in Northern California requires a balance between performance, cost, and application. Spray foam offers top-tier insulation and air sealing but demands a higher investment. Fiberglass provides a low-cost, straightforward solution best suited for new construction. Blown-in insulation presents a flexible and efficient option for retrofits or complex building shapes.
Ultimately, the right material depends on the specific requirements of the building and the goals of the developer. Whether working in coastal Petaluma or inland Sacramento, understanding how each insulation type responds to local conditions is key. Partnering with a knowledgeable insulation contractor for builders will ensure the project meets both energy efficiency standards and long-term operational needs. With careful planning and informed decision-making, commercial insulation can become a long-term asset rather than just a building requirement.
Need Insulation Near You?
Since 2001, Ace Insulation Inc. has been your premier insulation experts. We take pride in being locally owned and operated as well as offering high-quality service. We specialize in the installation of insulation. Whether you are building a new home or renovating your existing space, we are the place to call. We have many materials to choose from, including fiberglass and spray foam. If you are looking for high-quality work, call us today to schedule your next consultation!
Homeowners often think of insulation only in terms of energy savings or comfort, especially in colder seasons. While these are crucial aspects, insulation serves more than just an efficiency function. When your home’s insulation is compromised by pests or water damage, it becomes more than just a matter of performance. It turns into a health, safety, and long-term financial concern. Understanding when to replace insulation after such damage can prevent further deterioration and even structural issues. In regions like Nevada, spray foam insulation has grown in popularity, not only for its excellent sealing properties but also for its resilience. Still, even this high-performing solution can become ineffective under certain conditions.
The Hidden Costs of Pest-Compromised Insulation
Pest infestations bring more than just the visible nuisance of droppings, chewed wires, or foul smells. When rodents, insects, or other wildlife infiltrate attic or wall cavities, the damage they do to insulation can be both extensive and hard to detect at first. Rodents often tunnel through insulation, reducing its thermal efficiency. Their urine and droppings not only degrade the material but also pose serious health hazards, especially when particles become airborne and circulate through HVAC systems.
In traditional fiberglass insulation, pests find easy access and nesting opportunities. The compromised material begins to settle unevenly, creating gaps in thermal protection. This leads to increased heating costs during colder months, as your HVAC system works harder to compensate. Replacing damaged insulation after pest infestations is critical, especially if you’re pursuing long-term heating cost savings and indoor air quality.
While Nevada spray foam insulation offers a more pest-resistant structure due to its density and sealing capacity, no solution is entirely immune. If pests manage to penetrate or nest near the insulation, they may still degrade its performance over time. Once infestation is confirmed and pest control has addressed the root of the problem, it’s essential to inspect and assess whether the insulation has been compromised and should be removed.
Water Damage: A Silent Threat to Insulation Integrity
Water and insulation are a dangerous mix. Moisture intrusion from roof leaks, pipe bursts, or even high humidity can render insulation materials ineffective. In older homes, where fiberglass or cellulose insulation is prevalent, saturation from water flattens the material, destroying its ability to trap air and retain heat. Mold is another severe consequence, and once it sets in, insulation becomes not only useless but dangerous to health.
Spray foam insulation has the upper hand here, particularly closed-cell variants. It repels water and prevents moisture absorption, making it highly effective in damp environments. However, water damage around spray foam insulation, such as soaked studs or sheathing, can still result in hidden mold growth or structural rot. Therefore, even if the foam itself seems intact, surrounding materials may require replacement, and comprehensive moisture assessments are critical.
In homes impacted by water events, replacing insulation is not just about performance recovery. It’s about ensuring the building envelope remains dry, healthy, and safe. Restoration professionals often emphasize that drying and dehumidifying are only part of the solution. Replacing water-damaged insulation ensures you don’t trap moisture inside the wall cavity, which could lead to future complications.
Recognizing the Need for Replacement
The signs that your insulation needs replacement after pest or water damage might not always be obvious. In some cases, odors linger despite pest removal, or energy bills begin to climb without an apparent reason. In others, a winter inspection might reveal cold spots in certain rooms, prompting concerns about insulation gaps.
If you’ve recently dealt with pest infestations or water leaks, it’s wise to schedule a professional inspection. Experts use infrared thermography, moisture meters, and even small cameras to assess areas behind walls and ceilings. These tools can detect irregular temperatures or wet spots that indicate damaged insulation.
In Nevada, spray foam insulation is often chosen during home repairs or retrofits because of its long-term durability and ability to fully seal gaps and cracks. If your current insulation has suffered from contamination or degradation, replacing it with spray foam can provide both immediate and future benefits. Besides preventing air leakage, it acts as a barrier to allergens and contaminants, offering healthier indoor air quality.
The Value of Upgrading During Repairs
There’s a silver lining to insulation damage: the opportunity to upgrade. If your home has sustained pest or water damage and you’re already considering repairs, it’s the perfect moment to evaluate whether your current insulation is up to today’s standards. Many homeowners delay insulation upgrades due to cost or inconvenience, but when part of your insulation is already compromised, the cost-benefit balance shifts in favor of full replacement.
Choosing a winter insulation upgrade with spray foam is particularly strategic. As temperatures drop, having a tight building envelope becomes more crucial for comfort and energy savings. Upgrading not only helps recover from damage but also future-proofs your home from similar issues. Spray foam’s air-sealing characteristics block pest entry points and prevent air infiltration, making it a dual-purpose investment.
Energy savings from spray foam can be significant over time. In addition to keeping your home warmer in winter, it minimizes the workload on your HVAC system, extending its life and reducing maintenance needs. And while the initial installation cost is higher than that of fiberglass or cellulose, the return on investment through heating cost savings and resilience to future damage justifies the upgrade.
Making the Right Choice for Your Home
Deciding whether to replace insulation after pest or water damage involves more than just patching up what’s visible. It calls for a thorough assessment of your home’s envelope and a long-term view of indoor air quality, structural health, and energy efficiency. If you live in a climate with wide seasonal shifts, like Nevada, spray foam insulation delivers exceptional year-round performance and added protection against both pests and moisture.
It’s essential to work with licensed contractors familiar with your local climate and building codes. Not all insulation types are suited for all regions. Nevada homes, in particular, benefit from insulation that performs well in both summer and winter, making spray foam a compelling choice. An experienced contractor can also ensure proper removal and disposal of old, contaminated materials, minimizing health risks during the process.
Whether you’re reacting to damage or planning proactively, investing in better insulation pays off. From reducing energy bills to improving comfort and health, the right insulation choice can have a profound effect on your home’s performance.
Conclusion
Insulation is more than just a thermal barrier. It’s a critical component of your home’s comfort, safety, and efficiency. When pests or water compromise its integrity, it becomes essential to act swiftly. Ignoring contaminated or damaged insulation can lead to rising energy bills, poor indoor air quality, and even long-term structural damage.
Fortunately, this challenge also presents a chance to improve. By replacing damaged materials with high-performance options like spray foam insulation, you not only fix the problem but also invest in lasting energy savings and resilience. In states like Nevada, where seasonal extremes test the limits of your home’s envelope, a winter insulation upgrade using spray foam can yield immediate and long-term rewards.
Take the time to inspect, evaluate, and upgrade if needed. The benefits will be tangible in your heating cost savings, improved comfort, and peace of mind knowing your home is protected against future intrusions and damage.
Need Insulation Near You?
Since 2001, Ace Insulation Inc. has been your premier insulation experts. We take pride in being locally owned and operated as well as offering high-quality service. We specialize in the installation of insulation. Whether you are building a new home or renovating your existing space, we are the place to call. We have many materials to choose from, including fiberglass and spray foam. If you are looking for high-quality work, call us today to schedule your next consultation!
Areas Served
Proudly providing residential and commercial insulation installation to Petaluma, CA and the surrounding areas including:
Certificate of Approved Applicator from SWD, approved to install quik-shield polyurethane foam and coating products in residential and commercial applications according to the standards and guidelines as set forth by SWD Urethane