Spray foam insulation is known for its exceptional thermal performance and energy-saving capabilities. It tightly seals gaps and creates a continuous barrier that prevents air leaks and moisture intrusion. However, there are instances when this seemingly permanent solution must be removed—whether due to improper installation, remodeling projects, or the presence of mold and water damage. Removing spray foam insulation is not a simple process. It demands the right tools, protective equipment, and techniques, as well as a strong understanding of the risks involved. This article will walk you through the process of removing spray foam insulation step by step, from preparation to cleanup, highlighting safety considerations and best practices along the way.
Spray Foam Insulation
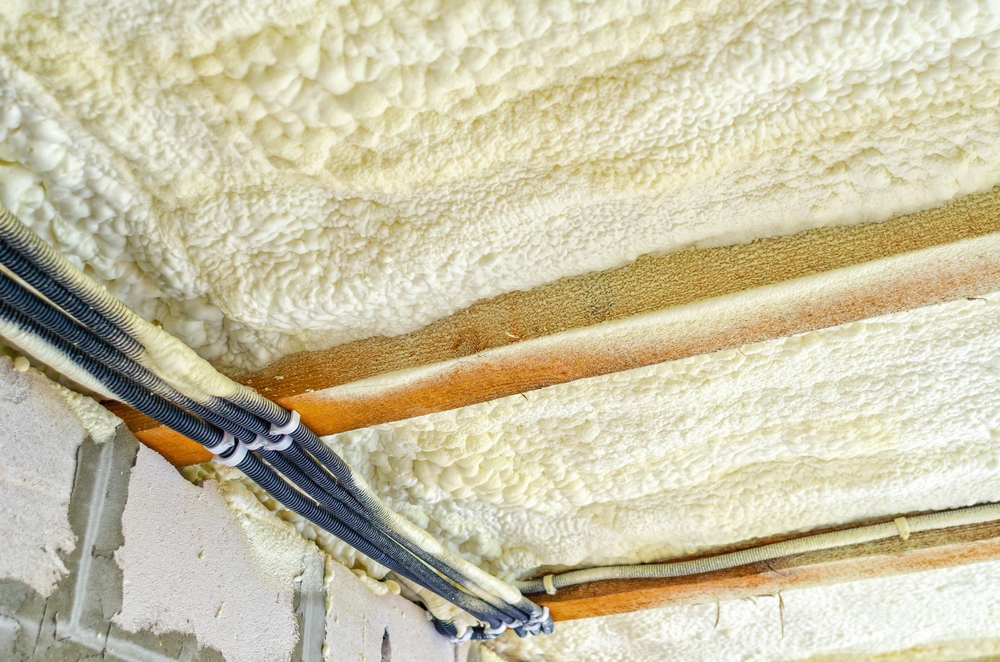
Spray foam insulation comes in two primary forms: open-cell and closed-cell foam. Open-cell foam is lighter, softer, and less dense, making it easier to remove but also less moisture-resistant. Closed-cell foam, on the other hand, is much denser and harder, offering superior insulation and structural reinforcement. The type of foam applied in your home will influence both the removal method and the effort required.
Spray foam expands and adheres strongly to surfaces like wood, drywall, and metal. Once cured, it can be difficult to remove without damaging the underlying materials. The foam’s chemical structure means it doesn’t simply chip away or flake off like other types of insulation such as fiberglass batts or loose-fill cellulose. That’s why most removal efforts combine mechanical force with heat or solvents in order to break the bond between the foam and the substrate.
In most cases, removal becomes necessary when spray foam insulation is applied incorrectly—such as uneven distribution, incomplete curing, or excessive expansion that warps structural elements. In other instances, occupants may experience allergic reactions or sensitivities to lingering chemical off-gassing. Mold infestations caused by water leaks trapped behind the insulation can also demand full or partial removal. Regardless of the reason, it’s essential to follow proper removal methods to protect your health, preserve building integrity, and ensure successful reinstallation of insulation later.
Tools and Materials Needed for Removal
Removing spray foam insulation requires a combination of manual and powered tools. At a minimum, you will need a utility knife with replaceable blades, a small hand saw or oscillating multi-tool, pry bars, and a stiff-bristled wire brush. For more significant applications, a reciprocating saw can help cut through thick foam sections attached to structural framing. In tight areas or along piping and wiring, specialized tools like foam scrapers or heat guns might be needed.
Personal protective equipment (PPE) is non-negotiable. Spray foam particles can become airborne during removal and may cause irritation to the eyes, skin, and lungs. Always wear gloves, long sleeves, safety goggles, and a high-quality respirator rated for dust and organic vapors. A full-body Tyvek suit can further protect your skin and prevent foam dust from clinging to clothing.
Depending on the removal method, you may also need chemical solvents. These are used to soften cured foam and make scraping easier, especially in hard-to-reach crevices. Commercial spray foam removers typically contain acetone, citrus-based d-limonene, or methylene chloride. Use caution, as some of these chemicals can damage surrounding surfaces and release fumes that are harmful in enclosed spaces.
Prepare the workspace by sealing off the area with plastic sheeting and using negative air pressure if possible. Lay down drop cloths or tarps to catch falling debris. This will simplify cleanup and prevent foam dust from migrating to other areas of the home. Also, have a shop vacuum with a HEPA filter on hand to collect particles as you work.
Step-by-Step Removal Process
The removal of spray foam insulation varies based on the location—walls, ceilings, crawlspaces, or attics—but the general process remains consistent. Start by visually inspecting the affected area. Identify how thick the foam is, whether it’s open- or closed-cell, and how securely it adheres to the substrate. This assessment will inform your approach and help estimate the time and labor involved.
Begin with cutting away large, accessible chunks of insulation using a utility knife or hand saw. Score the foam along edges or seams where it meets framing members. If you’re working with closed-cell foam, apply a heat gun on a low setting to soften the surface and reduce resistance. Once the bulk of the foam is removed, shift to smaller tools like scrapers or wire brushes to work on the remnants.
When foam is attached to delicate surfaces like drywall, try to minimize force to avoid damage. Instead, apply a foam removal solvent according to the manufacturer’s instructions. Let it sit for several minutes until the foam begins to dissolve or become tacky, then gently scrape away. Repeat this process as needed for stubborn spots.
Be patient. Removing spray foam is a slow and labor-intensive process. Avoid shortcuts like burning or high-temperature methods, which can release harmful fumes and present a fire risk. Similarly, avoid grinding tools that may aerosolize toxic particles.
If the insulation is between wall cavities, it might be necessary to remove a portion of the drywall to gain access. This is especially common when spray foam is applied too thickly, preventing electrical or plumbing repairs behind the wall. Cut away the drywall around the foam using a drywall saw and continue your removal efforts from within the cavity. Once the foam is completely cleared, you can reinstall drywall and prepare for fresh insulation.
Addressing Health and Safety Concerns
Health and safety are top priorities when removing spray foam insulation. During the removal process, foam particles and vapors can be released, especially if solvents or heat are used. Proper ventilation is essential—open windows, run exhaust fans, or set up a temporary ventilation system to maintain airflow.
Always dispose of foam debris according to local regulations. Cured spray foam is considered non-hazardous waste, but chemically softened or solvent-laden remnants may need to be handled as hazardous material. Double-bag foam pieces in heavy-duty trash bags and clearly label any solvent containers for safe disposal.
Take frequent breaks, especially when working in confined spaces like attics or crawlspaces. Overexertion, poor ventilation, and heat exposure can lead to fatigue and increase the risk of mistakes. Stay hydrated and work with a partner when possible.
Children and pets should be kept away from the work zone at all times. Even after removal, microscopic foam particles can linger in the air and on surfaces. Use a HEPA vacuum to clean thoroughly, then wipe down all surfaces with damp cloths to remove any remaining residue. Launder work clothing separately to prevent contamination of household fabrics.
Post-Removal Considerations and Reinsulation
Once the spray foam insulation has been removed, it’s important to assess the underlying structure for any damage, moisture, or mold. Take this opportunity to inspect wood framing, wiring, and plumbing for issues that might have been hidden by the insulation. Address any problems before moving forward with reinstallation.
Choose a replacement insulation type that suits your goals and the environment of the space. If you opt to reapply spray foam, ensure that it’s done by a certified professional who follows manufacturer guidelines and local building codes. Alternatively, you can use batt, blown-in, or rigid board insulation depending on access and budget.
Before reapplying insulation, let the space dry out completely and apply any necessary sealants or anti-mold treatments. If foam removal was driven by health concerns such as chemical sensitivity, you may want to conduct air quality testing before proceeding. This will ensure that all contaminants have been cleared and the space is safe for reoccupation.
Conclusion
Removing spray foam insulation is a task that requires caution, preparation, and diligence. Whether you’re correcting an installation mistake or making way for renovations, the process involves more than just brute force. With the right tools, protective measures, and step-by-step approach, you can safely remove spray foam insulation and restore your space to its intended condition. Always consider consulting a professional if the job proves too demanding or if health concerns are present. Doing it right the first time will save time, money, and headaches down the line.
Need Insulation Near You?
Since 2001, Ace Insulation Inc. has been your premier insulation experts. We take pride in being locally owned and operated as well as offering high-quality service. We specialize in the installation of insulation. Whether you are building a new home or renovating your existing space, we are the place to call. We have many materials to choose from, including fiberglass and spray foam. If you are looking for high-quality work, call us today to schedule your next consultation!